
Using Tixoom
So you've installed Tixoom - but how do you use it?
So, you've installed Tixoom and now you're wondering how it works? Wonder no more! We'll run through a quick intro so it all makes sense.
When you sign in to Tixoom for the first time, you'll be prompted to choose a username. This is important because in future when you want to encourage people to buy tickets to your events they'll do it from this address - so choose wisely!

Once done, you'll be at the 'Home' screen, which is your main dashboard. That's where you start everything with Tixoom:

This shows you a summary of your ticket sales so far. To get started, click the 'Events' tab on the left.

Now click an event you'd like to sell tickets to. If this is the first time you've used the platform, you'll be prompted to link with a secure payment processor called Stripe so you can get paid:

Stripe are trusted by companies like Facebook, Dropbox and many more - their secure payments infrastructure means you can be sure of getting paid. As part of this process they need to know a bit about you and your business, so click the 'Link with Stripe to get paid' button and then fill out the form which appears from Stripe: (or if your business already uses Stripe, you can click the link at the top right marked "Sign in")

Once you've completed this, click the 'Save and return to Tixoom' button at the bottom of the page. You'll then return to Tixoom; if you're based in the European Economic Area there might be a quick question on VAT registration (which is important) and then you'll be on the page for the event you chose earlier:
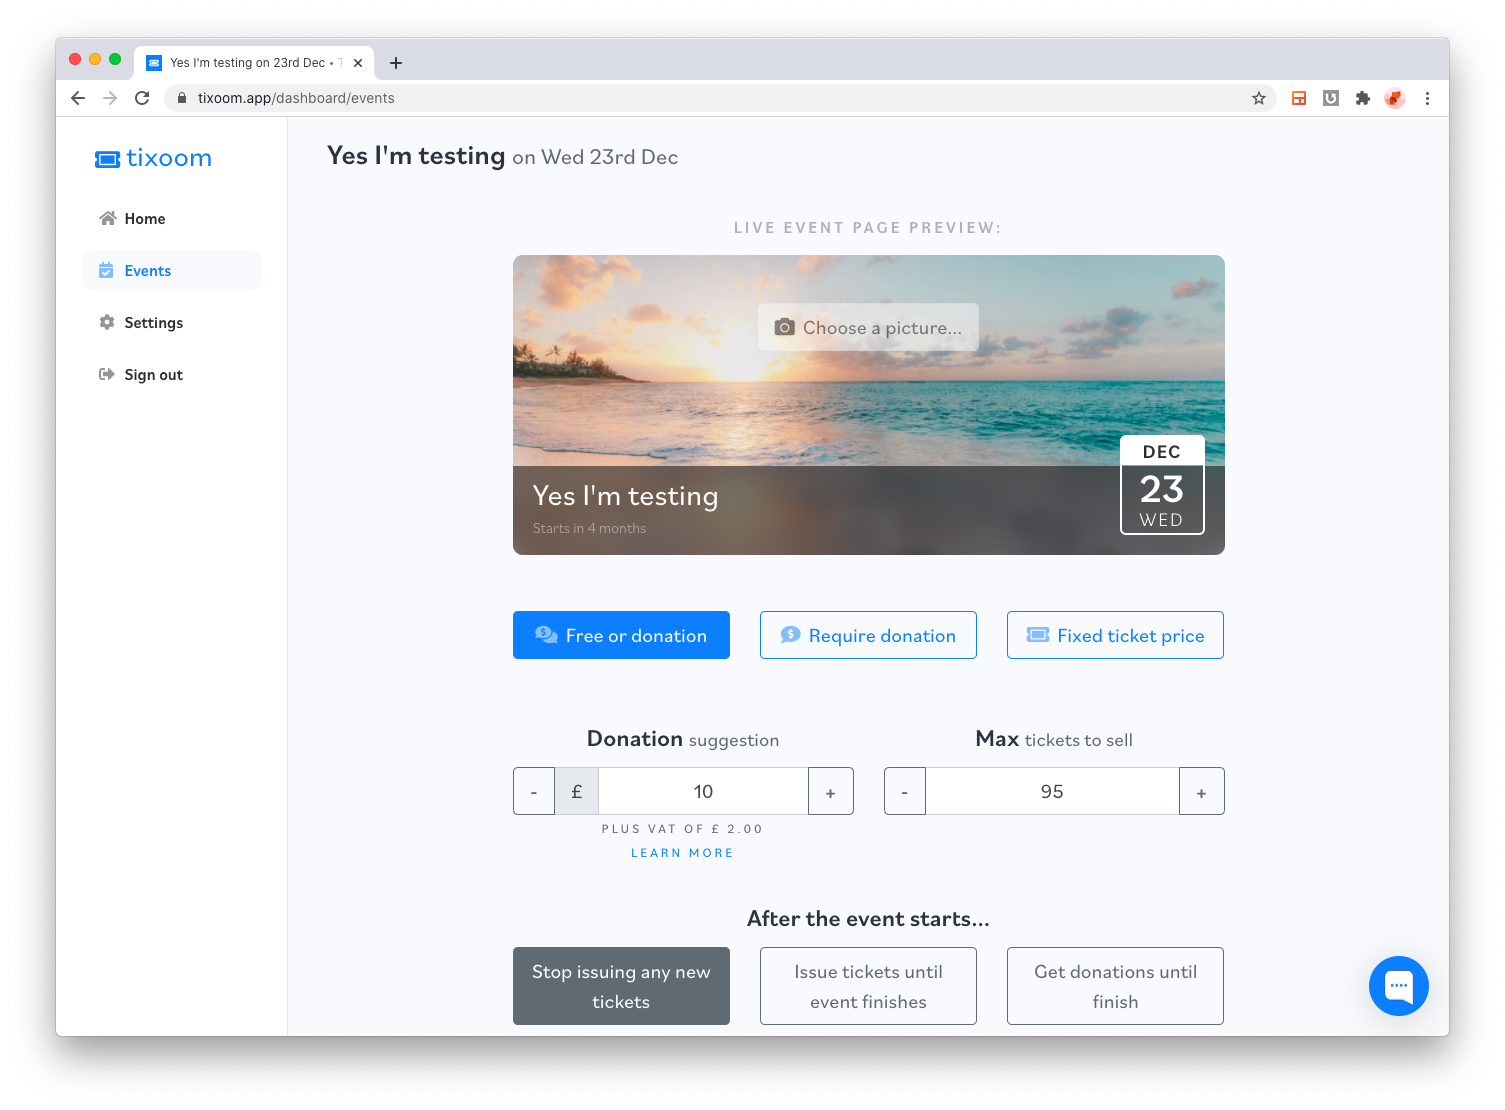
As you can see it's pretty straightforward - all the event's details are there. What you need to do is choose a beautiful header photo, and then decide how many tickets to make available to the event, under the heading 'Capacity,' and also choose the price of each ticket. Once you've decided on these, simply click the 'Start selling tickets!' button.
This will then unlock the 'Share my event' tab, showing you the unique link to your special events ticket page, along with lots of ways to share this with your potential customers - via WhatsApp, Facebook, Twitter and beyond:

That's it! Share your tickets page far and wide, and encourage as many people as possible to buy tickets to your event. Once people start buying your tickets, you can get an update from the 'Ticket sales' section at the bottom of the page - this shows the name, email and status of each attendee.
Got questions? Simply click the 'Chat' bubble that's hovering at the bottom right of every page and we'll get back to you as soon as possible.
Did this answer your question?